A reliable and well-maintained roof is crucial for a secure and comfortable home. It is the first defense against nature’s elements, particularly during heavy rainfalls. Rain showers can test homes, subjecting them to nature’s relentless force. In these challenges, a solid and leak-free roof is essential to protect your property from potential damage. These unwanted water intrusions can lead to problems like mold growth, wood rot, compromised insulation, and more.
This comprehensive guide to roof repairs explores the common obstacles homeowners face during heavy rain and the importance of a well-maintained roof in overcoming these challenges. With this information, you can make the most informed decisions on how to best deal with roof leaks.
Common Reasons For Roof Leaks In Heavy Rain
Understanding the leading causes of roof leaks during heavy rain is crucial. Here are why roofs tend to succumb to water damage in the presence of strong winds and prolonged downpours:
Improper Roof Installation
Improper application and alignment of roofing materials can lead to vulnerable areas where water can penetrate the structure, potentially causing damage. Issues such as gaps in flashing, poorly sealed joints, and inadequate insulation can arise from a subpar installation, creating pathways for water to enter the interior.
Flashing, usually made of metal, is a protective barrier in areas where the roof meets walls, chimneys, or vents. If the flashing isn’t properly fitted or sealed, rainwater can sneak in, causing leaks and gradually damaging the interior. Another weak point in a roofing system is the intricate network of joints. If these aren’t meticulously sealed, rainwater can seep through and gradually saturate the underlying layers, leading to leaks and compromising the roof’s structural integrity.
Moreover, if the insulation is not up to par, it can worsen leaks. When roofs are not properly insulated, the heat from inside can escape, causing uneven snow and ice to melt on the roof during winter. This melted water can seep into the roofing material, resulting in potential leaks and water damage when heavy rain comes. On top of that, lousy insulation can create temperature differences that lead to condensation buildup, making the risk of leaks even higher over time.
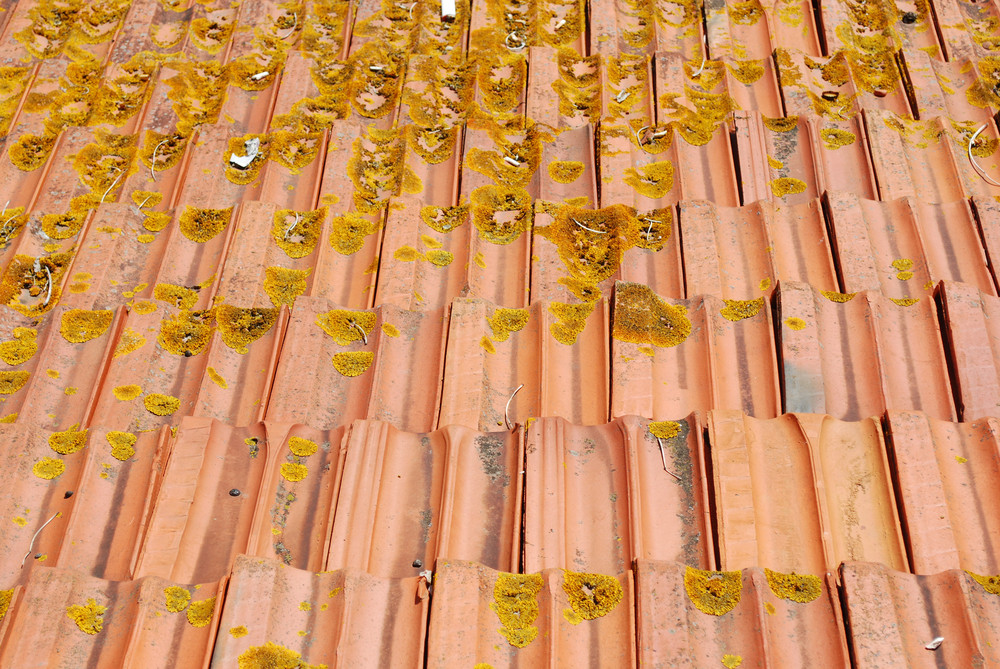
Damaged or Missing Shingles
Shingles serve as the primary barrier against rainwater, protecting the underlying layers and structure of the roof. When shingles get compromised through cracking, curling, or complete detachment, they create openings through which rainwater can infiltrate.
Cracked or curling shingles lose their ability to effectively repel water, allowing rain to seep underneath and penetrate the underlying layers. This moisture intrusion can lead to the roof deck rotting and mold and mildew growth, compromising the home’s structural stability and indoor air quality. Moreover, missing shingles create even more significant vulnerabilities, exposing larger roof portions to direct water exposure.
Strong winds during heavy rain can make damaged or missing shingles worse. The wind can lift and loosen shingles, creating gaps and lifting edges, which exposes the layers underneath to rainwater. When rainwater gets into these openings, it can saturate the roof deck, insulation, and even the home’s interior, causing significant water damage over time.
Clogged Gutters and Downspouts
These two have an essential job: directing rainwater away from the roof and foundation of the house. However, when these drainage systems get blocked, water builds up and overflows onto the roof and surrounding areas.
When rainwater falls on the roof, it should flow into the gutters to redirect it away. However, if leaves, twigs, dirt, and other debris accumulate in the gutters, they can block the water flow. It leads to pooling and overflowing onto the roof during heavy rain. Stagnant water can seep under shingles, find cracks, and cause leaks that damage the roof.
Additionally, clogged gutters can cause ice dams to form in colder months. When water cannot flow through the gutters and downspouts, it freezes along the roof’s eaves. Repeated freezing and thawing can lift shingles and create gaps where water can seep in. It can result in rot, mold growth, and other structural problems.
Compromised Flashing
Flashing is an essential part of a roof’s defense against water infiltration. It seals joints and intersections to prevent water from entering. Its main purpose is to create a barrier that keeps rainwater from penetrating gaps between roofing materials and structural elements like chimneys, vents, skylights, and dormers. If flashing becomes compromised or deteriorated, it can lead to leaks, especially during heavy rain.
Rainwater naturally flows along the easiest route, and compromised flashing becomes that pathway. Flashing can deteriorate over time due to exposure, temperature changes, and wear. Cracks, gaps, rust, and detachment are common issues that weaken flashing, enabling rainwater to penetrate the underlying roof layers.
During heavy rain, the force and volume of water worsen the vulnerabilities caused by compromised flashing. Water can seep into gaps, cracks, or loose flashing sections, gradually penetrating roofing materials. Once inside, water can saturate insulation, rot the roof deck, and promote the growth of mold and mildew. These consequences compromise the roof’s integrity and pose potential health risks due to mold-related issues.
Ways To Fix Roof Leakage Due To Heavy Rain
When heavy rainfall causes roof leakage, it is crucial to take prompt and efficient action to protect your home from potential damage. Below are practical solutions, from DIY steps for immediate relief to recognizing when expert intervention from the best roof rejuvenators is necessary, ensuring your roof remains secure and leak-free during adverse weather conditions.
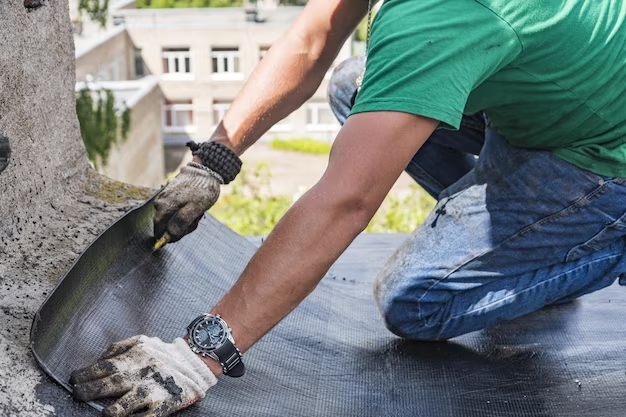
Temporary Patching
Temporary patching is a crucial technique for quickly addressing roof leaks caused by heavy rain. This method involves using readily available materials like roofing sealants or tarps to create a stopgap solution that prevents further water entry and minimizes damage until more comprehensive repairs can be undertaken. Immediate action is essential to mitigate the potential for escalating water-related problems within your home. Here’s how to perform temporary patching effectively:
- Safety First: Before attempting any repair, prioritize your safety. Ensure the roof is not slippery, and use appropriate personal protective equipment, such as non-slip shoes and a safety harness if needed.
- Locate the Leak: Identify the source of the leak from inside your home. Look for water stains, dripping water, or damp areas on ceilings or walls.
- Clear Debris: If possible, remove any debris or foreign objects from the affected area to ensure proper adhesion of the patching material.
- Choose the Patching Material: Choose the appropriate patching material depending on the nature of the leak. Like silicone or asphalt-based sealants, roofing sealants are suitable for smaller cracks or gaps. For larger areas or damaged shingles, consider using a waterproof tarp.
- Apply Roofing Sealant: Using a putty knife or caulking gun, carefully apply roofing sealant directly over the leak or the damaged area. Ensure even coverage and extend the patch slightly beyond the affected region.
- Secure a Tarp (If Needed): Drape a waterproof tarp over the compromised area for larger or more complex leaks. Attach the tarp securely using roofing nails or heavy-duty tape, making sure it covers the leak and extends beyond its perimeter.
- Seal Edges and Joints: With either method, seal the edges and joints of the patch with additional roofing sealant. This step is crucial to prevent water from finding its way underneath the patch.
- Monitor and Plan for Permanent Repair: Keep a close eye on the patched area during subsequent rain events. While temporary patching can provide immediate relief, it’s essential to plan for a permanent repair or professional inspection to address the root cause of the leak.
Temporary patching buys you time to arrange a more comprehensive and lasting repair, preventing further water damage to your home’s interior. Remember that while these solutions offer immediate relief, consulting a professional roofing contractor is recommended to ensure a thorough and lasting fix.
Replacing Damaged Shingles
Taking the initiative to replace damaged or missing shingles is a proactive measure that helps prevent roof leaks when heavy rain pours down. It’s crucial to address this issue promptly to maintain the integrity of your roofing system and prevent further damage. Below is a comprehensive guide to help you identify and replace damaged shingles effectively:
Identifying Damaged Shingles:
- Visual Inspection: Begin by carefully inspecting your roof from the ground with binoculars, looking for signs of cracked, curled, or missing shingles. Water stains on interior ceilings can also indicate potential issues.
- Safely Access the Roof: If it’s safe and you’re comfortable doing so, use a sturdy ladder to access the roof. Always ensure the ladder is securely positioned and follow proper ladder safety guidelines.
Replacing Damaged Shingles:
- Gather Materials: Before climbing onto the roof, gather the necessary tools and materials, including replacement shingles, roofing nails, a hammer, a pry bar, and a caulking gun.
- Remove Old Shingles: Gently lift the edges of the damaged shingle with a pry bar and carefully remove any nails. Slide the pry bar under the shingle above and loosen the nails. Lift and remove the damaged shingle.
- Prepare the Area: Inspect the underlying area for any signs of water damage or rot. Replace or repair damaged roofing felt or underlayment as needed.
- Install New Shingle: Slide the new shingle into place, aligning it with the surrounding shingles. Secure it with roofing nails, driving them through the designated nail line on the shingle. Be sure to follow the manufacturer’s guidelines for proper placement and nail quantity.
- Secure and Seal: Apply roofing sealant under the edges of the adjacent shingles to ensure a watertight seal. Gently press down on the new shingle to ensure it lies flat and securely adheres.
- Trim Excess: If necessary, trim any excess shingle material to ensure a neat and uniform appearance.
- Inspect the Repair: Double-check the surrounding shingles for any damage or potential issues. Make sure the replaced shingle is securely fastened and properly sealed.
Safety Tips:
- Always prioritize safety. Wear appropriate footwear with good traction and consider using a safety harness if you’re uncomfortable with heights.
- Choose a dry, calm day to perform shingle replacement to reduce the risk of accidents.
- If you’re unsure about climbing onto the roof or the repair seems complex, it’s advisable to seek professional assistance from a roofing contractor.
Clearing Clogged Gutters
Proper water drainage is essential to safeguard your home’s foundation and structural integrity. The following is a step-by-step guide to help you safely and effectively clear clogged gutters:
- Gather Necessary Tools and Equipment: Before you begin, ensure you have the right tools on hand. You’ll need a sturdy ladder, work gloves, a trowel or scoop, a bucket or tarp to collect debris, a garden hose with a nozzle, and safety goggles.
- Safety First: Place the ladder on a stable and level surface. Make sure it’s securely positioned, and consider having a spotter to hold the ladder steady as you climb. Wear appropriate clothing and safety gear, including gloves and safety goggles.
- Start with Downspouts: Begin by clearing any debris from the downspouts. Use a trowel or scoop to remove leaves, twigs, and other obstructions. If the downspout is severely clogged, you may need to disconnect it from the gutter to clear the blockage.
- Clear Gutters: Work along the gutters, using your trowel or scoop to remove debris. Place the collected debris into a bucket or tarp for easy disposal. Ensure you clear both the bottom of the gutter and the downspout openings.
- Rinse with Water: After removing larger debris, use a garden hose with a nozzle attachment to rinse out the remaining dirt and smaller particles. Start from the end opposite the downspout and work your way towards it. This helps ensure proper water flow.
- Check for Proper Drainage: Observe the flow of water as you rinse the gutters. Ensure that water is freely flowing through the downspouts and away from your home’s foundation. Further inspection may be needed if water is pooling or not draining correctly.
- Regular Maintenance: To prevent future clogs and leaks, establish a routine for gutter maintenance. Clean your gutters at least twice a year, ideally in the spring and fall, or more frequently if trees surround your property.
Repairing Flashing
Repairing compromised flashing is critical in preventing roof leaks and water infiltration during heavy rain. Flashing is a protective barrier at vulnerable junctions on your roof, such as chimneys, vents, and skylights. When compromised, it can lead to significant water damage if not addressed promptly. Here’s a simple guide to help you identify and repair damaged flashing:
- Inspection: Begin by carefully inspecting your roof for damaged or deteriorated flashing signs. Look for visible cracks, gaps, rust, or detachment. Pay close attention to areas where different roofing materials meet and the intersections between the roof and any structures or features.
- Gather Materials: For minor repairs, you’ll need roofing sealant (such as silicone or asphalt-based sealant), a putty knife or caulking gun, a wire brush, and a cloth for cleaning the area.
- Clean the Area: Use a wire brush to clean the damaged flashing and the surrounding area. Remove any debris, rust, or old sealant. Wipe the area clean with a cloth to ensure proper adhesion.
- Apply Roofing Sealant: Using a putty knife or caulking gun, carefully apply roofing sealant over the damaged area. Ensure the sealant covers the cracks or gaps in the flashing. Smooth out the adhesive to create a watertight seal.
- Press and Secure: Press down on the sealed area to ensure the sealant adheres properly. Use a putty knife or your finger to smooth the edges of the sealant and create a seamless finish.
- Monitor and Maintain: Regularly inspect the repaired area during subsequent rain events to ensure the sealant remains intact and effective. If you notice any issues, such as leaks or further deterioration, it may be a sign of more extensive flashing damage requiring professional attention.
- Seek Professional Assistance (If Needed): If the flashing damage is extensive or you’re uncomfortable performing repairs independently, it’s advisable to seek professional assistance. A qualified roofing contractor can assess the extent of the damage, recommend the appropriate maintenance, and ensure that the flashing is restored to its optimal condition.
When it rains heavily, it’s crucial to address roof leaks promptly to protect your home’s integrity. By proactively identifying and resolving potential sources of leaks, homeowners can prevent water damage from wreaking havoc. Timely maintenance and repairs are a wise investment that extends a roof’s lifespan and helps avoid more extensive and costly fixes down the line.